
Gyomei Himejima Crochet Doll Pattern Beginner Friendly
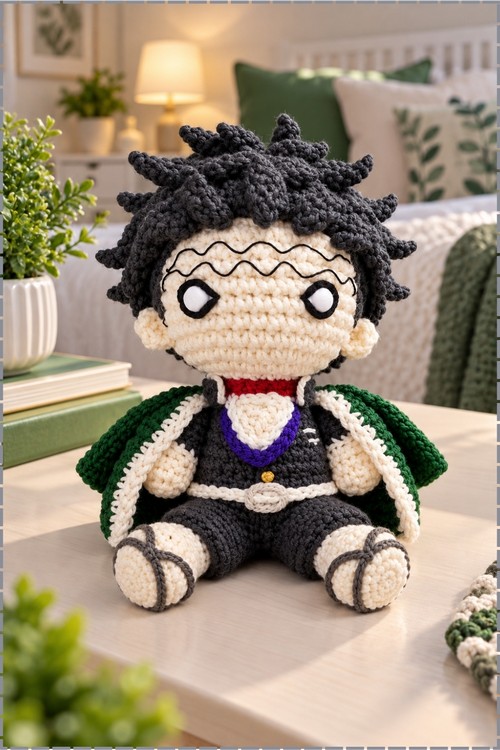
Pin short chain segments on one at a time and the spiked charcoal hair of this crochet Gyomei Himejima doll starts to appear. A deep green haori edged in white, painted white safety eyes, and a zigzag lace forehead scar then dress a basic doll body, and every step uses beginner stitches.
Requests for the crochet gyomei himejima doll keep coming because anime collectors want pieces nobody else has made yet. The haori and hair tufts are what people recognise instantly. Makers who post one crochet gyomei himejima doll usually end up fielding questions about the rest of the cast.
Crochet Gyomei Himejima Doll
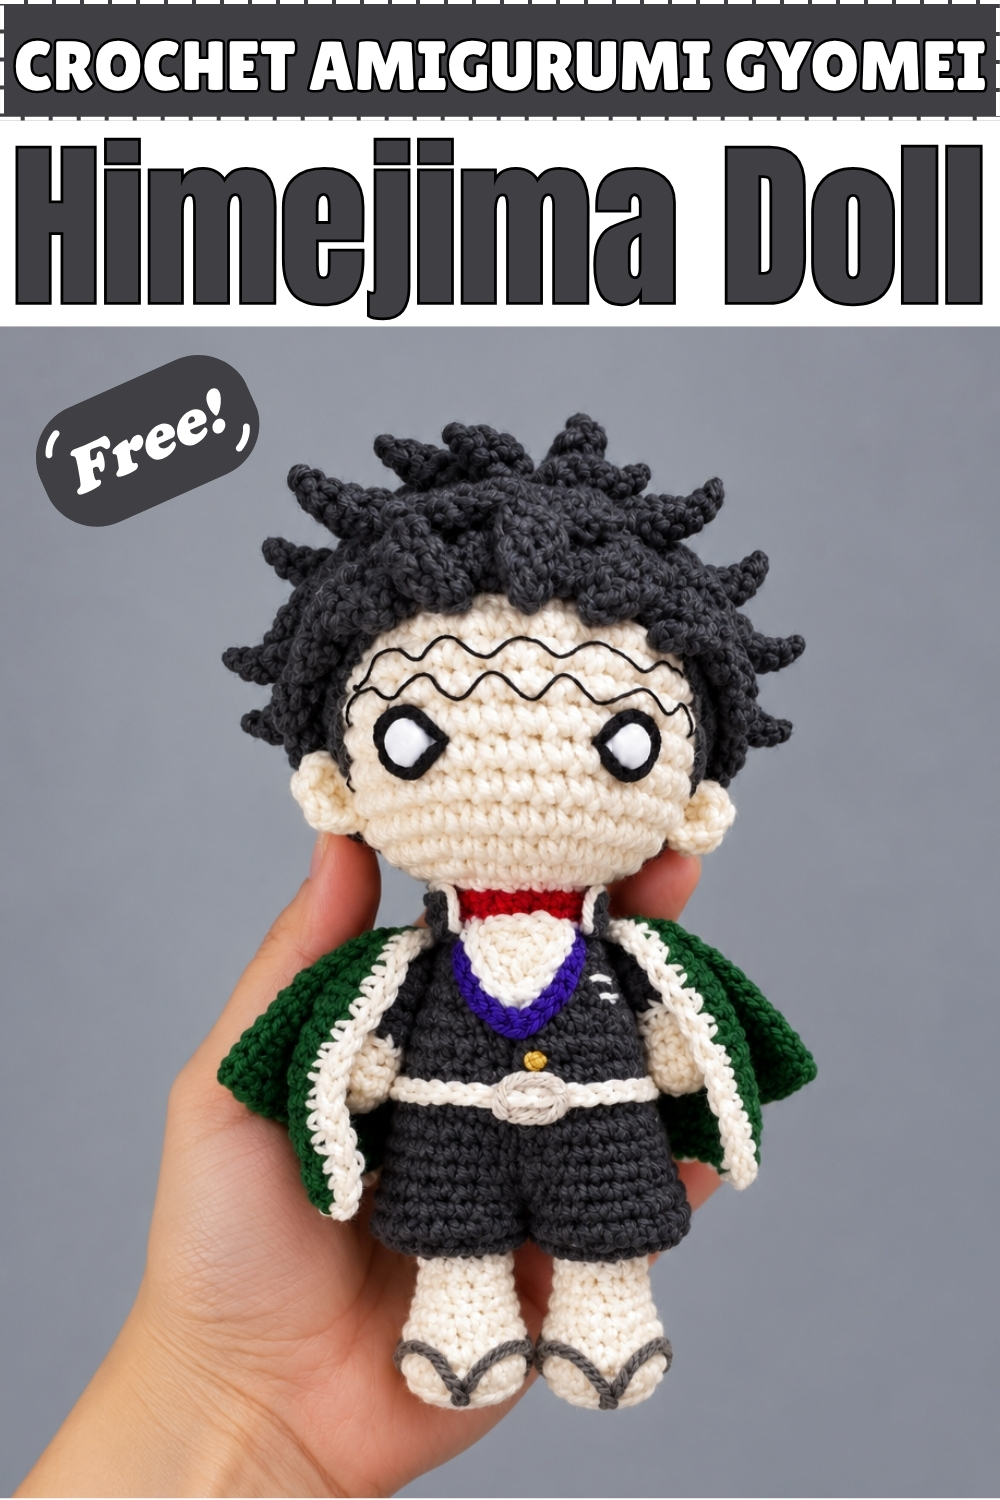
Assembly carries most of the work on this crochet Gyomei Himejima doll, since the character comes together through layered pieces sewn and glued onto a finished body. Hair builds from short chain segments pinned on one at a time, which is what creates the spiked outline. Mine uses a cream skin tone with charcoal hair and a deep green haori edged in white. Safety eyes painted solid white give the blank gaze the character is known for. Zigzag lace yarn runs across the forehead as the scar. Beginners can manage every stitch here, though patience matters more than skill.
Read This First
This is a styling and assembly guide rather than a stitch by stitch amigurumi pattern. The source gives colours, placements, and techniques for dressing and detailing a doll, and it assumes you already have a basic doll body to work on.
That is good news for a beginner. Nothing in it requires a hard stitch. What it requires is pinning, checking, and being willing to move a piece three times before gluing it down.
Materials and Tools
- Cream or light skin tone yarn for the head, neck, hands, and legs
- Charcoal or black yarn for the hair, pants, and top
- White yarn for the sandals, leg bandages, belt, and jacket edging
- Grey yarn for the sandal straps
- Deep green yarn for the haori jacket
- Purple yarn for one of the chest layers
- Red yarn for the choker
- Honey or mustard coloured yarn for the knot above the belt
- Silver yarn for the belt buckle
- Black lace yarn for the forehead scar, and for the arm veins if you want them
- 12 mm safety eyes
- White paint for the eyes
- Fabric glue
- Sewing pins, plenty of them
- Scissors and a sewing needle
- A broken felt tip needle or similar blunt poking tool
- Mesh fabric and Mod Podge, or black and white paint, if you want the shaved back of the head
Difficulty and Time
The stitching is beginner level. The assembly is where the hours go, and there are a lot of separate small pieces to place.
In my experience this is a multi session project rather than an afternoon one. Set aside time across several days, mostly because glue needs to dry between stages and rushing that is how pieces end up crooked.
Beginner Technique Notes
Read these before you start, because most of the project is technique rather than pattern.
- Pin everything first. Every single placement in this guide should be pinned, viewed from the front, viewed from the side, and only then glued or sewn. Glue is unforgiving on yarn and lifting a piece back off takes fibres with it.
- Use fabric glue, not hot glue or craft glue. Fabric glue stays flexible when dry, so the doll's clothes do not go stiff and crack.
- Apply glue in small dots, not lines. Dots hold perfectly well on yarn and they do not soak through and darken the fabric.
- Let each layer dry fully before adding the next. The chest has several stacked layers and adding a new one onto wet glue shifts the one underneath.
- Chain segments for hair: you are making short chains of a set length, then placing them individually. A 4 chain piece gives a short strand, an 8 chain piece gives a longer one you can fold into a spike. That is all the stitching the hair needs.
- Poking yarn ends into the fabric: push the cut end into the doll's surface with a blunt needle. It hides the end and stops fraying without any sewing.
- Counting placement: when the guide says to count stitches and rows to position something, count on the actual doll rather than estimating. Ears especially look wrong by a surprising amount if they are one row off.
- Work symmetrically. Place the left and right of any pair at the same time rather than finishing one side completely first, so you can compare as you go.
The Pattern
Lower Body, Shoes, and Legs
- Start the bottom of the shoes in white yarn to form the sandals, which represent flip flops.
- Sew grey yarn along the sandals, then glue it onto the feet on both sides to create the sandal straps. On my doll the straps form a simple V from the toe back to the sides, which is what reads as a flip flop at this size.
- Use white yarn for the bandages wrapped around the legs. Mine sit on the lower leg between the sandals and the hem of the pants.
- Transition to black yarn for the long pants, then push the pants up slightly on both sides to give them a poofy look. The push up is what stops the legs looking like plain tubes.
Arms and Upper Body
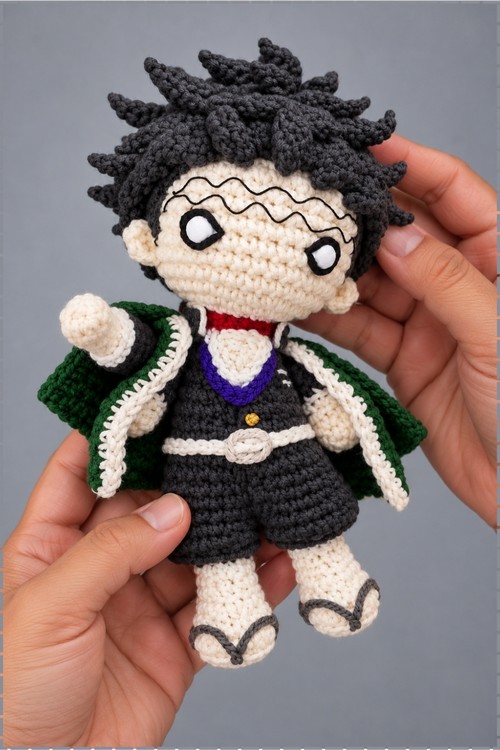
- Crochet two identical arms, starting in the skin colour at the hands, transitioning up to white, and then to black. Work both arms at the same stage so the colour change points land in the same place on each.
- Sew black lace yarn along the arms to mimic the character's veins, if you want them. My doll does not show veins, so treat this as optional.
- From the neck forward, work in the skin coloured yarn.
Eyes and Face
- Paint the 12 mm safety eyes completely white, since the character has no pupils. Let them dry fully before fitting, or the paint will smudge against the fabric.
- Create a small shape in black yarn to frame each eye and sew it on. On mine this reads as a thin black outline all the way around each white eye, which is what makes them stand out against the cream face.
Ears
- Make two small ears in the skin coloured yarn.
- Position each one by counting 4 stitches across from the eye and 1 row down.
- Attach them with fabric glue and hold them with pins while drying. You can puncture the base slightly with a broken felt tip needle for extra stability. Check both ears from the front before the glue sets, since ears at different heights are the most noticeable asymmetry on a doll's face.
Hair Cap
- Make a black hair cap using 4 inner rounds and 3 outer rounds, leaving enough room for the ears to show.
- Leave a small bald area right beneath the neck at the back. The cap is the base that every hair piece later attaches to, so make sure it sits straight before anything goes on top of it.
Belt and Chest Details
- Crochet a white belt and sew it around the waist at round 14.
- Glue a piece of silver yarn around the middle of the belt to act as the buckle. On mine the buckle sits dead center at the front and is the only silver on the whole doll, so it draws the eye.
- Tie a piece of honey coloured yarn into a knot and attach it right above the belt buckle at round 15.
- Create a small triangle piece for the chest and attach it right beneath the neck area with fabric glue.
Outfit Layers
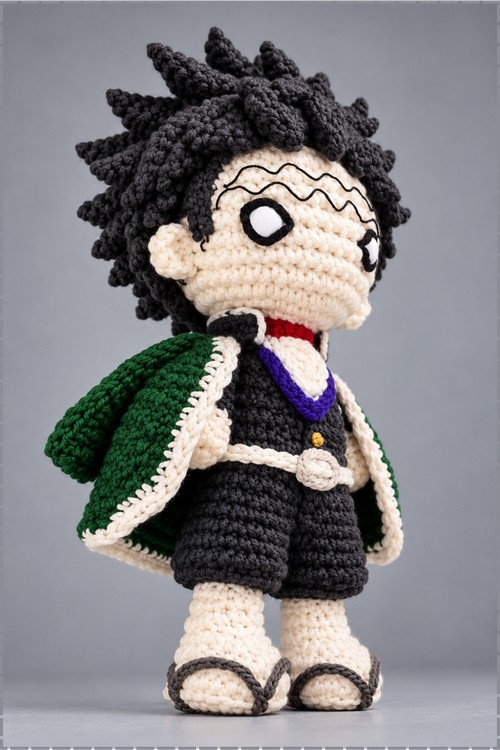
- Make a chain of white yarn and glue it directly underneath the chest triangle.
- Make a chain of purple yarn and glue it right underneath the white layer. On my doll the purple sits as a wide V shape down the chest and is the most visible of the layers.
- Make a chain of red yarn and sew it around the neck to form the beaded choker. Mine sits high and tight at the throat, just above the chest layers.
- Crochet a single row of single crochet in black yarn for the collar, glue a white outline along its edge, then wrap and glue it around the neck from one open end round to the back and down the other side.
The Haori Jacket
- Use a deep green yarn to crochet the main jacket body and two separate sleeve pieces.
- Attach the sleeves to the second row of the jacket, skipping about 3 stitches in from each outer edge, so they hang loose and flap at the sides.
- Single crochet the outer edges of the jacket in white. The white edging runs all the way around the front opening on mine and is what makes the green read as a haori rather than a plain coat.
- Secure the jacket by applying fabric glue to the doll's shoulders and pinning the jacket down until dry. Glue only at the shoulders. Gluing further down locks the jacket flat against the body and the open draped look disappears.
Head Details and the Forehead Scar
- For the shaved area at the back of the head, apply layers of mesh fabric coated with Mod Podge, or paint over mesh with a dark grey mix of black and white paint. My photo shows the front only, so treat this step as optional depending on whether you want the back detailed.
- Pin black lace yarn across the forehead in a zigzag for the scar.
- Secure the yarn with tiny dots of fabric glue at the peaks and points of the zigzag. Glue only the points, not the whole length, so the lines keep their sharp angles.
- Poke the yarn ends into the head with a broken felt tip needle to stop them fraying. On my doll the scar runs the full width of the forehead in a continuous wave, sitting just above the eyes.
Hair Styling and Spikes
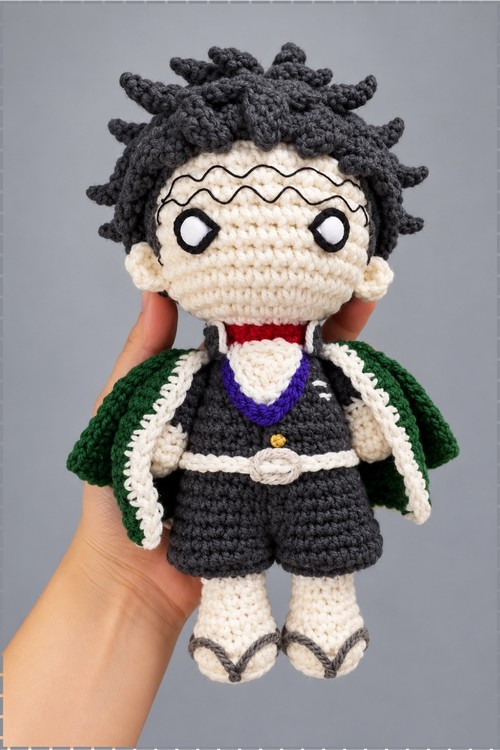
- For the front hairline, use 4 chain segments pointing downward and slanted in alternating directions along the forehead to frame the face.
- For the spiky hair on the top and front, use 8 chain triangles.
- Place the triangles with pins and either bend them backward or let them flare outward so they stand up visibly in profile. Pin the whole head before gluing any of it, because the spikes only look right in relation to each other.
- Mirror the arrangement on both sides so the spacing stays even and no strand blocks its neighbour.
- Fill in the back of the head with flat 8 chain pieces fitted tightly together like puzzle pieces, laid directly against the hair cap. Keeping the back flat makes the doll easier to store and display without crushing the spikes.
Tips and Troubleshooting
Yarn Substitution
Any smooth worsted or sport weight yarn works for the body and clothes. Cotton gives the cleanest edges on the small layered pieces, which matters because so much of this doll is small flat shapes sitting next to each other.
Lace weight yarn is genuinely needed for the scar and the optional veins. Regular yarn is far too thick and the scar will look like a rope across the forehead rather than a fine line.
Avoid fuzzy yarn everywhere. On a doll with this much fine detail, a halo erases the outlines you worked to build.
Customization Ideas
- Add the arm veins if you want a more accurate version. Mine leaves them off for a cleaner look.
- Detail the back of the head with the mesh and paint method, or leave it plain.
- Make the haori in a different green, or line the inside in a contrast colour.
- Swap the painted safety eyes for embroidered white ovals if paint makes you nervous.
- Adjust the spike density. Fewer, longer spikes give a wilder look and more, shorter ones a neater one.
- Make the jacket removable by skipping the shoulder glue and sewing a small hidden fastening instead.
FAQ
Do I need to know how to make an amigurumi doll body first?
Yes. This guide covers the clothing, hair, face, and assembly, and assumes a basic doll body already exists. Make a simple amigurumi doll first, then come back and dress it.
Is fabric glue really necessary, or can I sew everything?
You can sew most of it, and sewing is stronger. Glue is used here because the pieces are small and flat and sewing them distorts the shapes. If you sew, use matching thread and tiny stitches around the edges.
How do I stop the safety eyes smudging when I paint them?
Paint them before they go into the doll, lay them face up on a scrap of card, and give them two thin coats with full drying time between. Handling a wet eye is what causes smudges.
What if I cannot find lace weight yarn for the scar?
Split a strand of regular yarn down to one or two plies. It will not be perfectly even, which actually suits a scar.
My hair spikes keep falling over. What am I doing wrong?
Most likely the glue was applied along the whole chain instead of just at the base. Glue the base only and let the rest of the chain stand free, then bend it into position while the base sets.