
How To Crochet A Clownfish Amigurumi Free Pattern
Working in 4 ply milk cotton on a 2.0 mm hook keeps this clownfish amigurumi small enough to hang from a keyring. Chocolate brown replaces the usual orange, cream stripes break up the body, and embroidered eyes can stand in for the glitter safety eye on baby gifts.
Crochet Clownfish Amigurumi
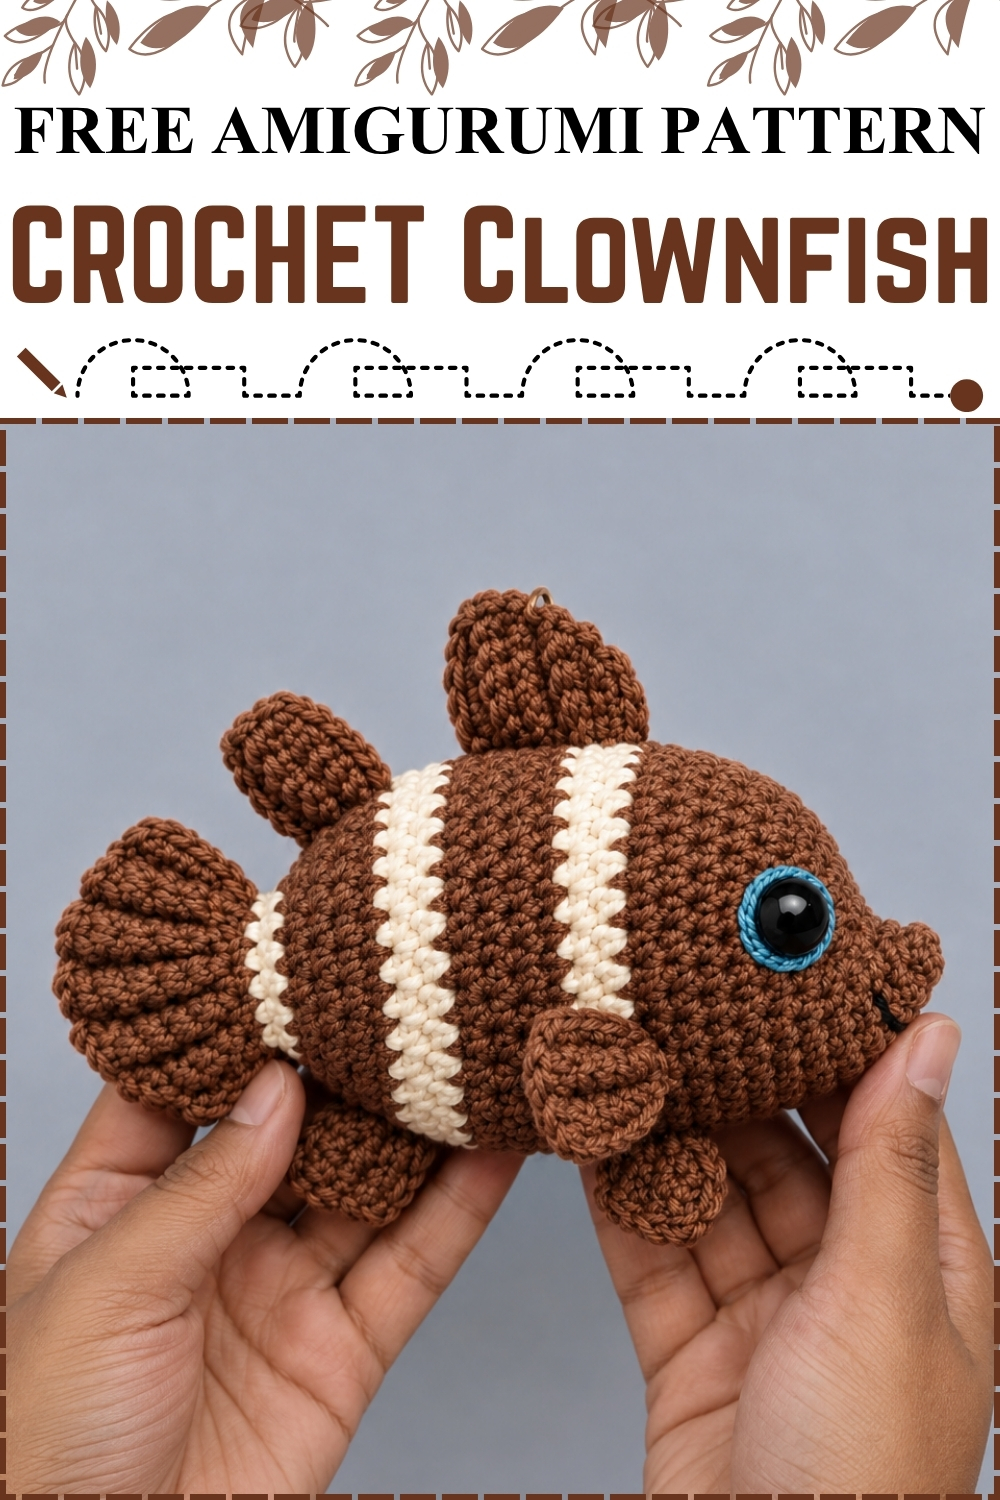
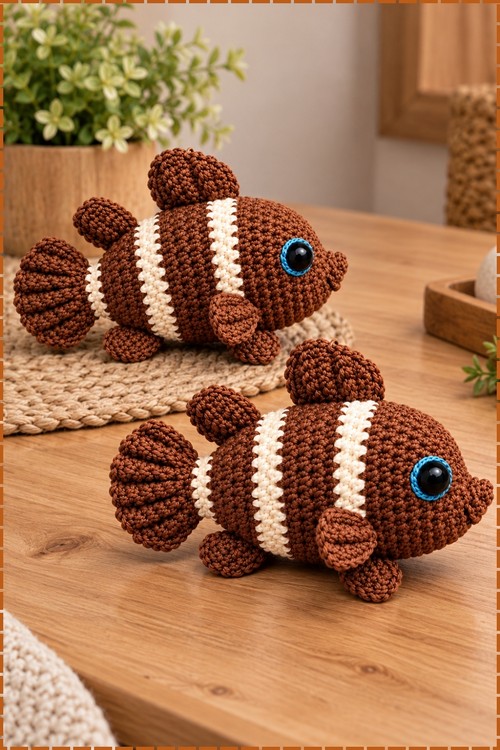
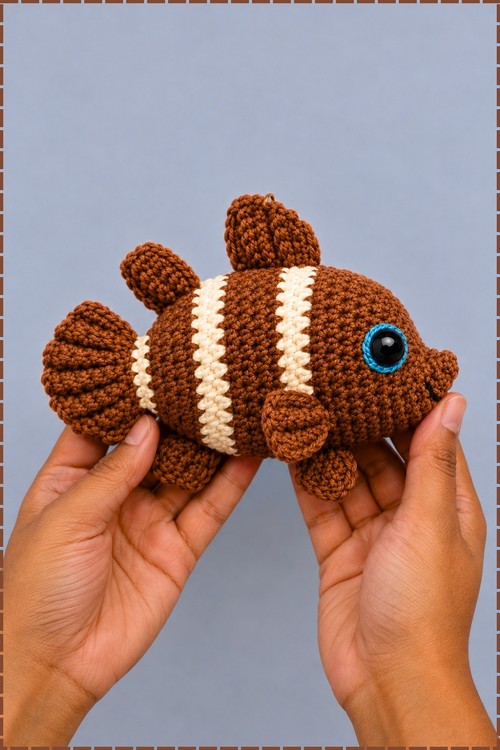
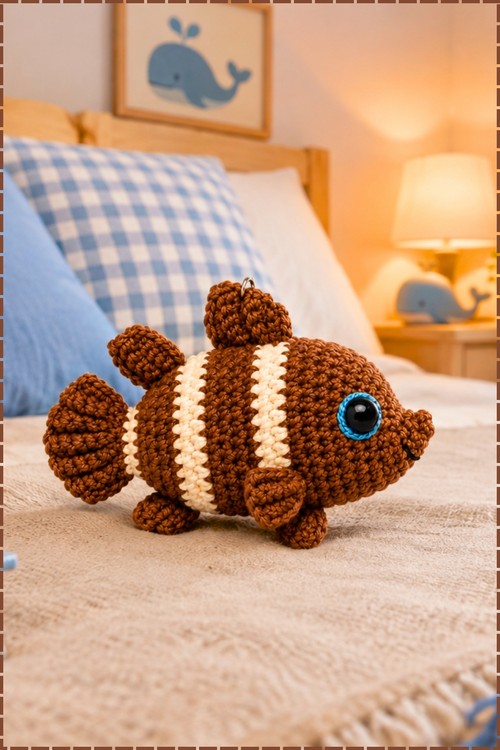
Seven fins sound like a lot before you start, and then you make the first one and realise each takes only a few rows. That is the thing about this crochet clownfish amigurumi: the body comes together fast, and the fins are where you get to slow down and add the details that make it look finished. My version uses warm chocolate brown instead of the classic orange, paired with cream stripes and a large blue glitter safety eye. All the fins are brown to match the body, and the ribbed tail fans out wide enough that it reads as the focal point before you even notice the keyring at the top.
Materials and Tools
- 4 ply milk cotton yarn in chocolate brown for the body, pectoral fins, pelvic fins and dorsal fins.
- 4 ply milk cotton yarn in cream for the two stripe sections and the tail fin.
- 2.0 mm crochet hook.
- One large blue glitter safety eye, secured with its washer from the inside. My fish has one prominent eye on the visible side.
- Fiberfill or cotton stuffing.
- Small keyring or jump ring attached to the top of the body. Mine is a plain silver ring.
- Tapestry needle, stitch markers, scissors.
Difficulty and Time
This pattern sits at easy to intermediate and is completely manageable for a careful beginner. The body rounds are straightforward single crochet, and the only technique that needs practice beforehand is back loops only, which the tail and fins both use. From my own making I would budget around two and a half to three hours for the complete fish including all fins. If you are new to BLO (back loops only), read the technique note below and try a small swatch before the tail section.
Beginner Technique Notes
Back loops only, abbreviated as BLO throughout, means inserting the hook into only the loop that sits furthest away from you on each stitch, leaving the front loop standing on the surface as a ridge. That ridge is what gives the tail and fins their layered, ribbed texture. It is easy to forget and slip into both loops out of habit, and the difference is visible the moment you hold the fin up: a BLO row has a neat raised line along its length, and a regular row looks flat. Checking after every row is worth doing.
Colour changes work best when you make the swap on the very last pull through of the stitch before the new colour, not at the beginning of the new round. Making the change a stitch too late leaves a fleck of the old colour on the first stitch of the stripe.
Keep your stitch marker moving into the first stitch of every body round. The body grows to 36 stitches and stays there for 13 rounds, and without the marker it is almost impossible to know where each round ends in a spiral.
Start stuffing the body during Rounds 14 to 17, not all at once at the end. The shape is much easier to control when you add small amounts continuously rather than forcing a large amount through the narrowing opening later.
The Pattern
Part 1: Body
Work in a continuous spiral throughout. Begin with chocolate brown yarn.
- Round 1: Make a MR (magic ring), ch 1 and work 5 sc (single crochet) into the ring. Pull the ring tight (5 sts).
- Round 2: Work 2 sc, 1 inc (increase, 2 sc in the same stitch), 2 sc (6 sts).
- Round 3: Work 1 inc, 1 sc, 2 inc, 1 sc, 1 inc (10 sts).
- Round 4: Work 1 sc, 7 inc, 2 sc (17 sts).
- Round 5: Work 4 sc, [1 sc, 1 inc] repeat 5 times, 3 sc (22 sts).
- Round 6: Work 5 sc, [1 inc, 1 sc] repeat 6 times, 5 sc (28 sts).
- Round 7: Work 6 sc, [1 inc, 1 sc] repeat 8 times, 6 sc (36 sts). The body has now reached its full width and should feel like a broad flat disc.
- Rounds 8 to 11: Work 1 sc in each st around for 4 rounds (36 sts per round).
- On the very last stitch of Round 11, change to cream yarn on the final pull through.
- Rounds 12 to 13: With cream yarn, work 1 sc in each st around for 2 rounds (36 sts per round). This is the first cream stripe. Insert the safety eye into the brown section now, before the opening narrows further, and lock the washer in from inside.
- On the last stitch of Round 13, change back to chocolate brown.
- Rounds 14 to 17: With brown yarn, work 1 sc in each st around for 4 rounds (36 sts per round). Begin stuffing the body with small pinches of fiberfill as you work through these rounds.
- Rounds 18 to 19: With cream yarn, work 1 sc in each st around for 2 rounds (36 sts per round). This is the second cream stripe, which you can see clearly in the photo sitting just behind the first.
- On the last stitch of Round 19, change back to brown.
- Round 20: With brown yarn, work 1 sc in each st around (36 sts).
- Round 21: Work [4 sc, 1 dec (decrease)] repeat 6 times (30 sts).
- Round 22: Work [3 sc, 1 dec] repeat 6 times (24 sts).
- Round 23: Work [2 sc, 1 dec] repeat 6 times (18 sts).
- Round 24: Work [1 sc, 1 dec] repeat 6 times (12 sts). Make sure the body is fully stuffed before continuing.
- Round 25: Fold the opening flat and work 6 sc through both the front and back layers together to close the body flat. At the end of this row, change to cream yarn to begin the tail.
Part 2: Tail Fin
Worked directly onto the closed edge of Round 25 in cream yarn. All rows use BLO except where noted.
- Row 1: Ch 5. Starting in the 2nd chain from the hook, work in the back bumps of the chain: 4 sc. Sl st (slip stitch) into the first stitch of the body base. The tail fan grows from this anchor point outward.
- Row 2: Skip the sl st. BLO: sc across until the last stitch, then work 1 inc in the last stitch.
- Row 3: Ch 1 and turn. BLO: 5 sc. Sl st into the next stitch on the body base.
- Row 4: Skip the sl st. BLO: sc across until the last stitch, then work 1 inc in the last stitch.
- Row 5: Ch 1 and turn. BLO: 6 sc. Sl st into the next stitch on the body.
- Row 6: Skip the sl st. BLO: 6 sc.
- Row 7: Ch 1 and turn. BLO: 6 sc. Sl st into the next stitch on the body.
- Rows 8 to 11: Continue the same pattern. Skip the sl st heading up the fin, ch 1 and turn heading back down, work in BLO throughout, and sl st into the body base at the end of each return row. The fin tapers down naturally during the last few rows as it anchors across all 6 stitches of the closed body edge. Fasten off and hide the yarn tail inside the body.
Part 3: Pectoral Fins (Make 2)
Use chocolate brown yarn. Leave a long starting tail for sewing.
- Row 1: Ch 5. Starting in the 2nd chain from the hook in the back bumps: 4 sc.
- Row 2: Ch 1 and turn. BLO: 3 sc, 1 inc.
- Row 3: Ch 1 and turn. Skip the 1st stitch. BLO: sc across.
- Row 4: Ch 1 and turn. BLO: 4 sc.
- Row 5: Ch 1 and turn. Skip the 1st stitch. BLO: 4 sc.
- Fasten off leaving a long tail for sewing. Skipping the first stitch on alternating rows is what shapes each fin into a small curved paddle rather than a rectangle. Make the second fin exactly the same way.
Part 4: Pelvic Fins (Make 2)
Use chocolate brown yarn. Leave a long starting tail for sewing.
- Row 1: Ch 4. Starting in the 2nd chain from the hook in the back bumps: 3 sc.
- Row 2: Ch 1 and turn. BLO: 2 sc, 1 inc.
- Row 3: Ch 1 and turn. Skip the 1st stitch. BLO: sc across.
- Fasten off leaving a long tail for sewing. These small fins sit beneath the belly and are easy to overlook, but they give the finished fish its grounded, swimming stance.
Part 5: Dorsal and Anal Fins
Large dorsal fin (make 1), use chocolate brown yarn:
- Row 1: Ch 4. Starting in the 2nd chain from the hook in the back bumps: 3 sc.
- Row 2: Ch 1 and turn. BLO: 2 sc, 1 inc.
- Row 3: Ch 1 and turn. BLO: 4 sc.
- Row 4: Ch 1 and turn. BLO: 3 sc, 1 inc.
- Row 5: Ch 1 and turn. BLO: sc across.
- Fasten off leaving a long tail.
Small dorsal fin and anal fin (make 2 total, one for the top and one for the underside), use chocolate brown yarn:
- Row 1: Ch 4. Starting in the 2nd chain from the hook in the back bumps: 3 sc.
- Row 2: Ch 1 and turn. BLO: 2 sc, 1 inc.
- Row 3: Ch 1 and turn. BLO: 4 sc.
- Fasten off leaving a long tail.
Part 6: Assembly
- The safety eye should already be secured inside the brown head section. If not, insert it now through the opening before the body is fully closed.
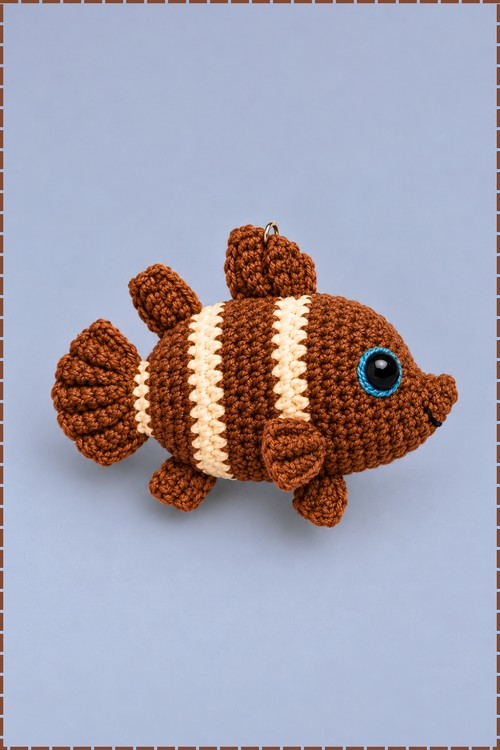
- Sew the large dorsal fin onto the top of the body directly behind the head, with the tallest edge facing toward the head. In my photo it sits upright and is visible clearly above the body line.
- Sew the small dorsal fin immediately behind the large one on the same top seam.
- Sew one pectoral fin to each side of the body at the level of the first cream stripe, with the wider base of the fin against the body. Mine fan outward and slightly forward, matching their position in the photo.
- Sew both pelvic fins underneath the belly on the front half of the body, spacing them evenly.
- Sew the anal fin underneath the body near the tail end.
- Attach the small silver keyring to the top of the body between the eye and the large dorsal fin, threading it through a stitch at the seam and going over it twice so it holds firm.
- Hide all remaining yarn tails inside the body.
Tips and Troubleshooting
The tail is where most makers lose track. Count which body stitch you have anchored into at the end of each tail row and mark it. If the slip stitch travels unevenly across the 6 base stitches, the tail fans sideways rather than straight back. Stitch count discrepancies in the early body rounds accumulate quickly at a 2.0 mm hook, so count Round 7 carefully before moving into the straight section. If the cream stripes look diagonal rather than level, the colour change happened one stitch late. Going back one stitch and redoing the change takes a minute and the difference is visible on every other stripe for the life of the fish. Pin every fin before sewing any of them, and check the whole fish from directly above to catch asymmetry before it is locked in.
Yarn Substitution
Milk cotton at 4 ply is the right choice for this pattern. It has just enough body to hold the fin shapes without blocking, and the twist gives the colour changes a clean edge that looser spun yarn blurs. Standard mercerized cotton at the same weight is a direct substitute. Regular acrylic at 4 ply works but the fins will be softer and the BLO ridges less defined. Anything heavier than 4 ply produces a fish that is too large for a keychain at this hook size.
Customization Ideas
- Work the pattern in traditional orange and white for the classic clownfish look the original pattern intends.
- Try a dark teal body with cream stripes for a damselfish feel.
- Use metallic thread held alongside the yarn on the dorsal fin for a shimmer detail.
- Add a second safety eye on the opposite side of the head for a fully round fish.
- Skip the keyring and sew a hanging loop directly to the back of the large dorsal fin, chaining until the loop reaches your preferred length.
- Make a set of three in different brown shades, chocolate, caramel and tan, for a graduated display.
Frequently Asked Questions
Why does my BLO tail curl instead of lying flat? The chain 5 foundation in Row 1 is almost always the culprit. If it is too tight, the whole tail curls toward the foundation rather than fanning out. Work the chain loosely and stretch it gently before working the 4 sc into the back bumps.
How do I keep the colour change from bleeding? Carry the waiting colour up the inside rather than cutting at each change, and always swap on the very last pull through of the stitch before the stripe begins. Swapping a stitch early leaves a bleed on the last stitch of the old colour; swapping a stitch late bleeds onto the first stitch of the new stripe.
My fins look uneven from side to side. What should I do? Make both fins in the same sitting so your tension is identical across each one. Count the rows on both before picking up the needle. Then pin them both onto the body before sewing either, and stand the fish up to check the balance from the front. Sewing one fin then eyeballing the second is where asymmetry always starts.
Can I use regular safety eyes instead of the blue glitter ones? Yes. Plain black or brown safety eyes read as more realistic, while the blue glitter eye on my version gives a stylised cartoon quality. Either works at 10 mm. Go smaller only if the fish will go to a child, and use embroidered eyes for babies under three.
Is the anal fin really necessary? It is not structurally necessary, and the fish looks complete without it. Anatomically a clownfish does have one, and sewing it on adds to the realism at the cost of about five minutes. Leave it off if you want a faster finish.